Handmade Journal Ideas Part 4: Tea Bags & Gum Strip
Dec 12, 2025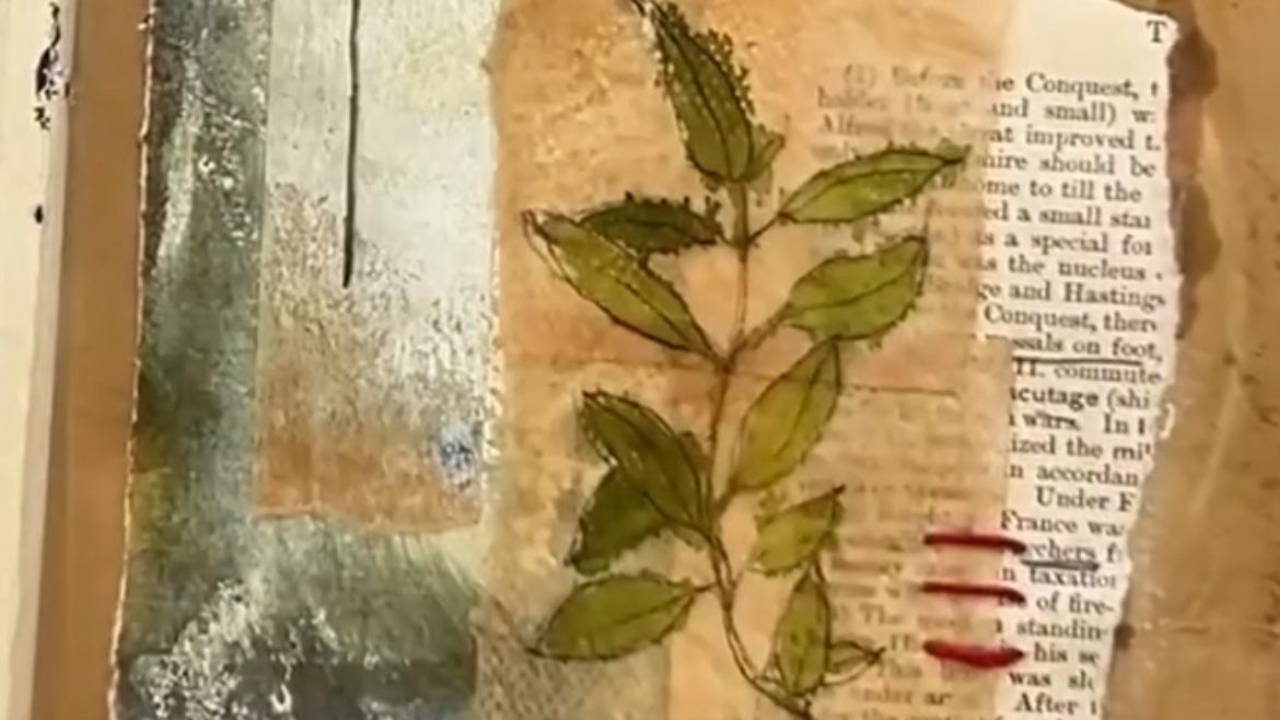
Have you ever tried using tea bags in your collage art? If not, you're in for a real treat - they add such a lovely vintage feel to your work.
Welcome to the final instalment of my 4-part Handmade Journal Ideas series. In this series so far, we've explored:
• easing into a creative flow in Part 1
• burned paper techniques in Part 2
• bead and stitching embellishments in Part 3.
This final lesson has quite a lot packed into it, and I'm really looking forward to taking you through it all.
I'll show you a few simple ways to transform ordinary teabags into delicate, one-of-a-kind pieces of art.
I'll also demonstrate how to Gelli print onto gum strip - a really handy kraft paper tape you can use to bind pages together if you fancy adding a few extras to your journal.
And finally, I'll walk you through how I pull everything together at the end to create a composition.
I hope you enjoy it!
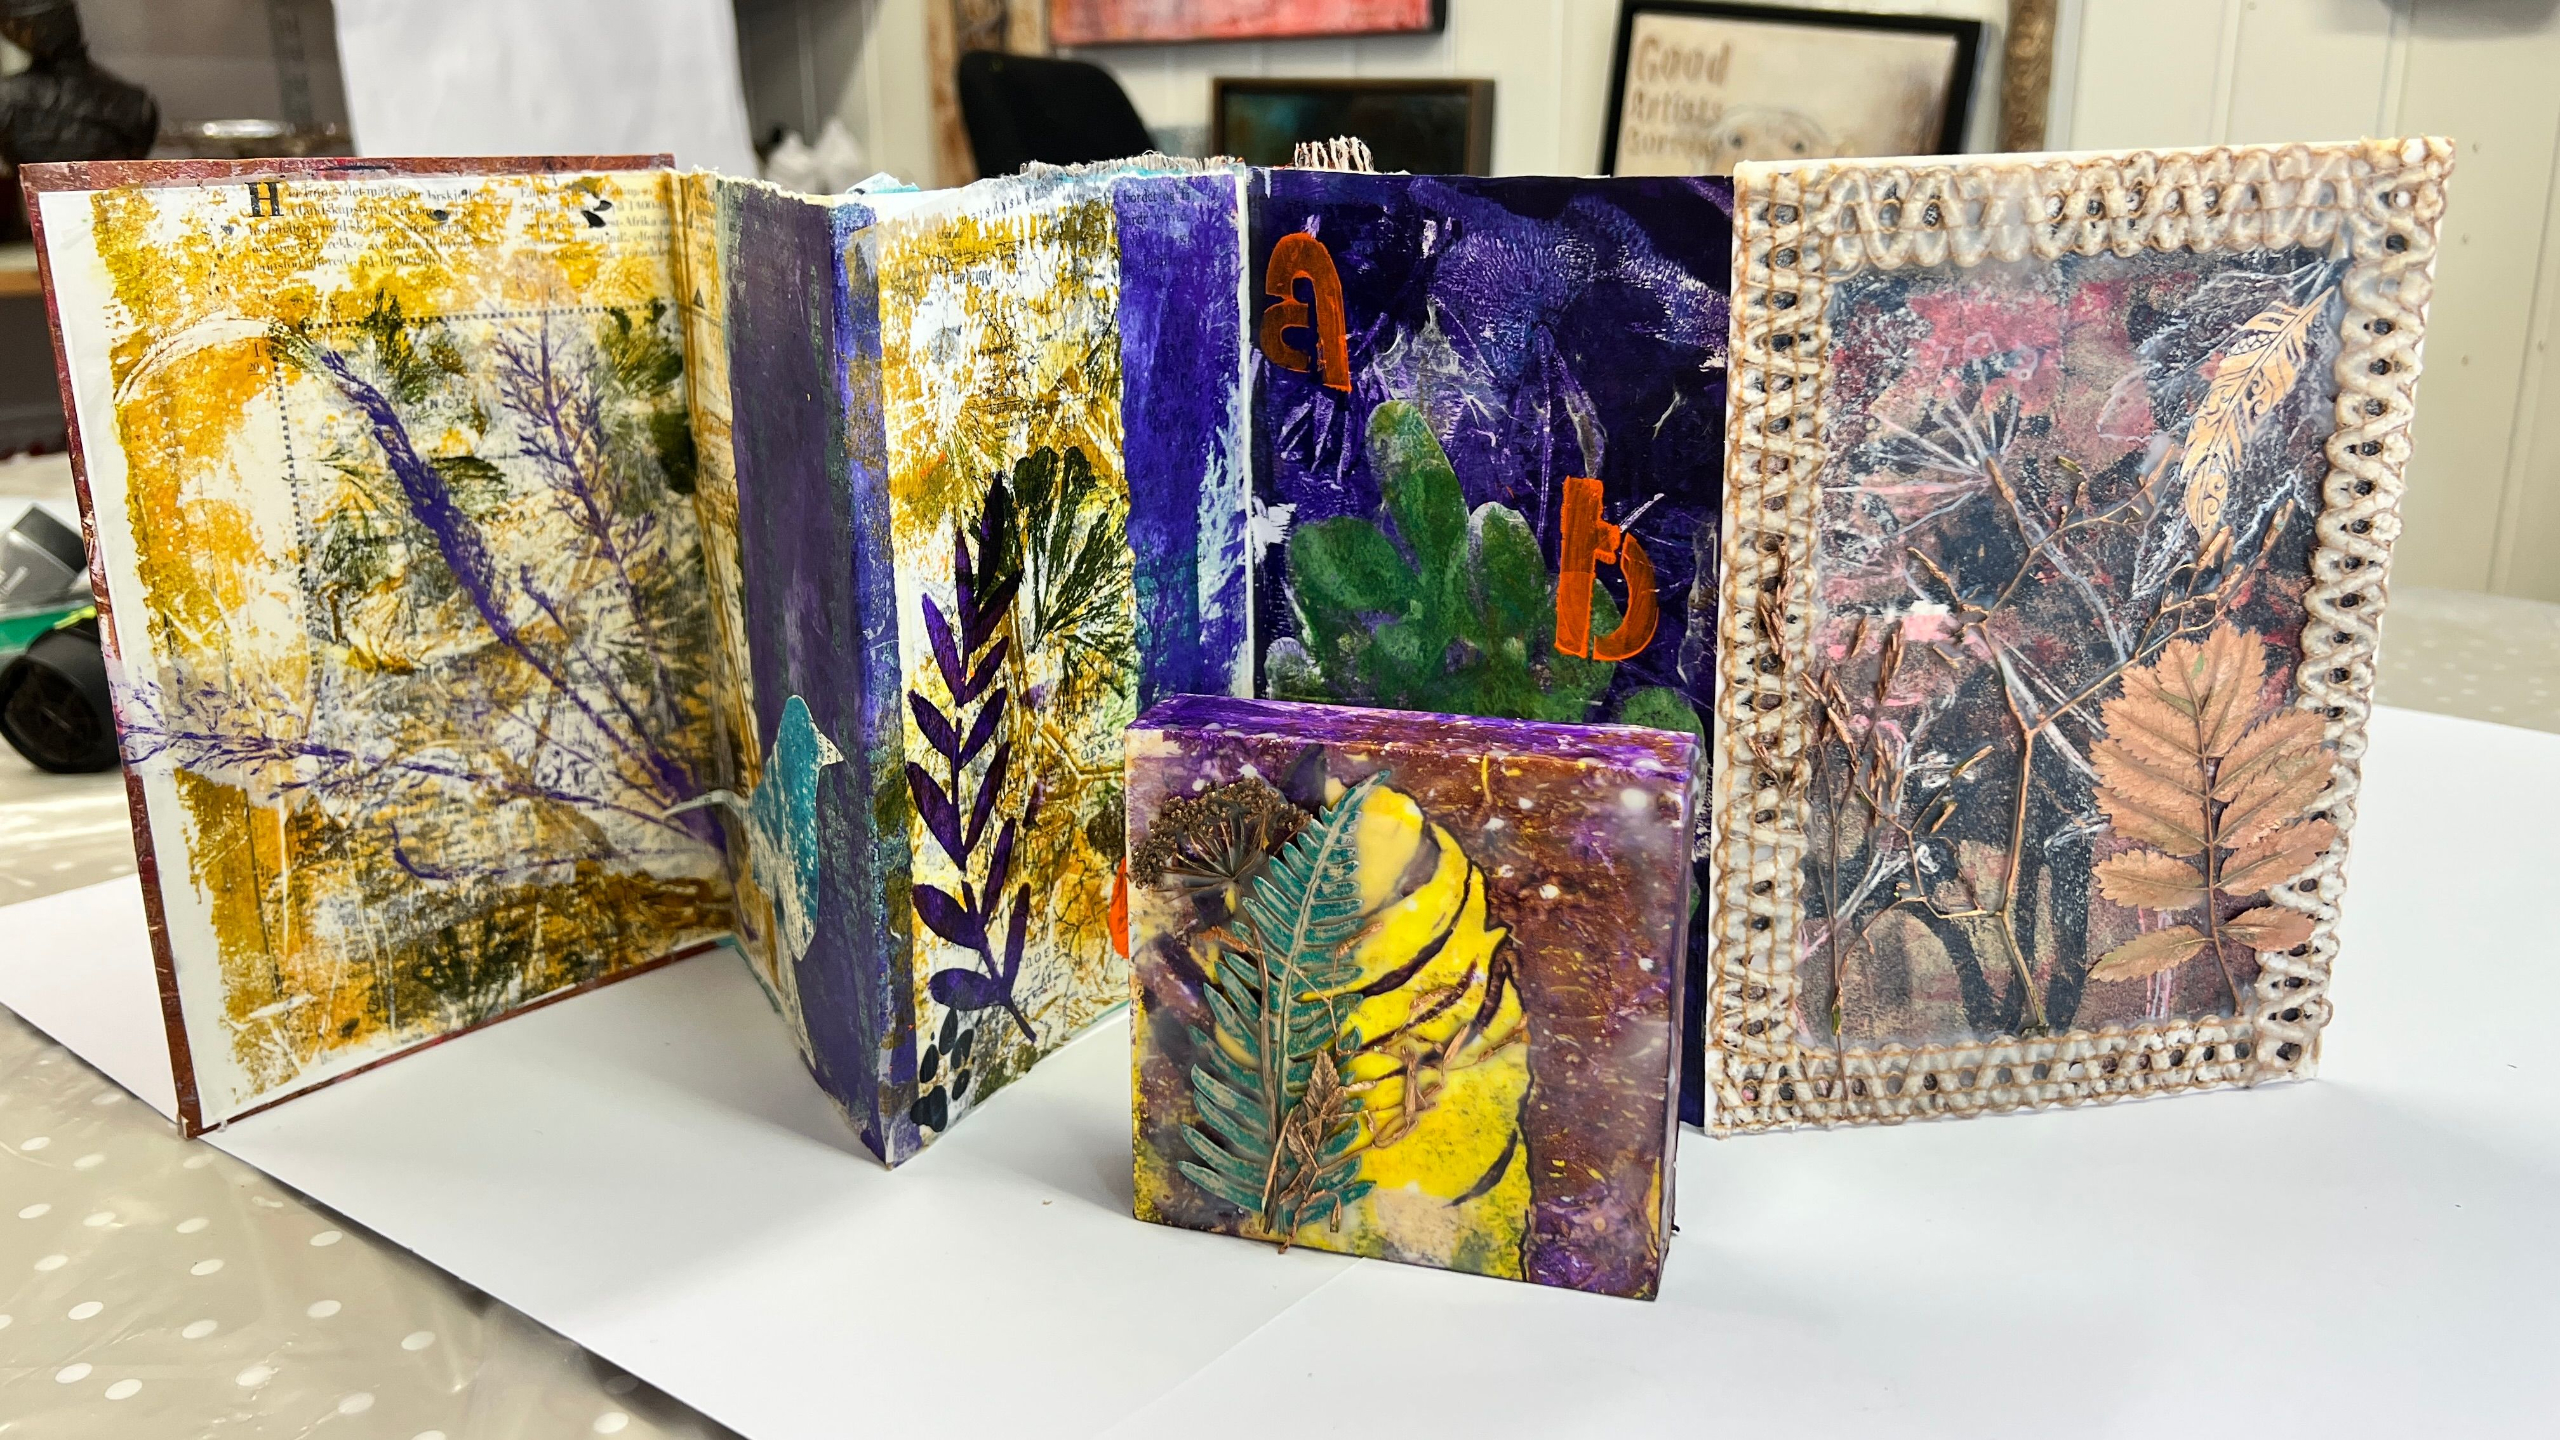
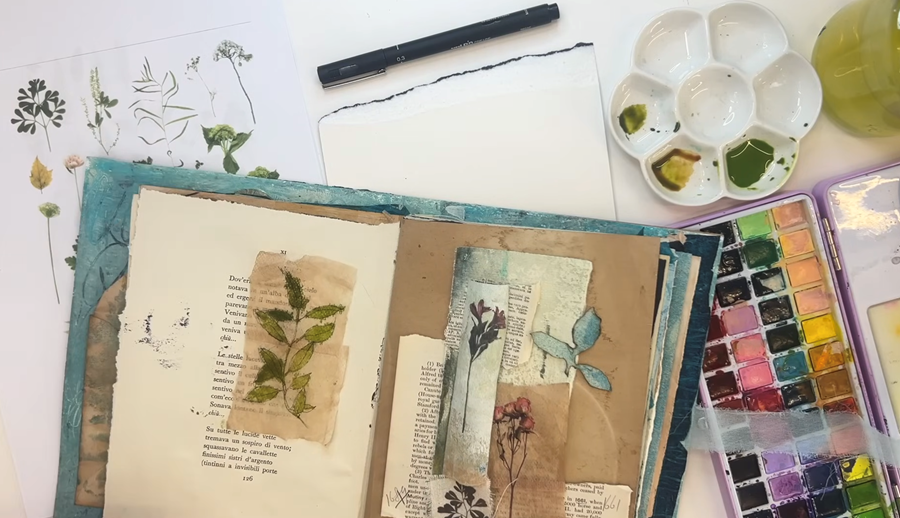
Materials You'll Need
Art journal: Can be a brand new journal or one you've already started
Collage papers: This can be a combination of handmade & Gelli printed papers, fabric and vintage book pages.
Glue stick
Gum Strip
Teabags: washed and dried
Transfer Leaf Shapes: Adhesive leaf and flower designs
Bone Folder: Used for smoothing or flattening edges or for pressing transfers
Acrylic Paint: In this lesson, I used Buff Titanium, Iridescent Gold, Raw Umber, and Titanium White
Gelli Plate: 5 x 7
Brayer
Embroidery Thread
Please note: As an Amazon Associate, I earn from qualifying purchases.
Adding Transfers to Gum Strip
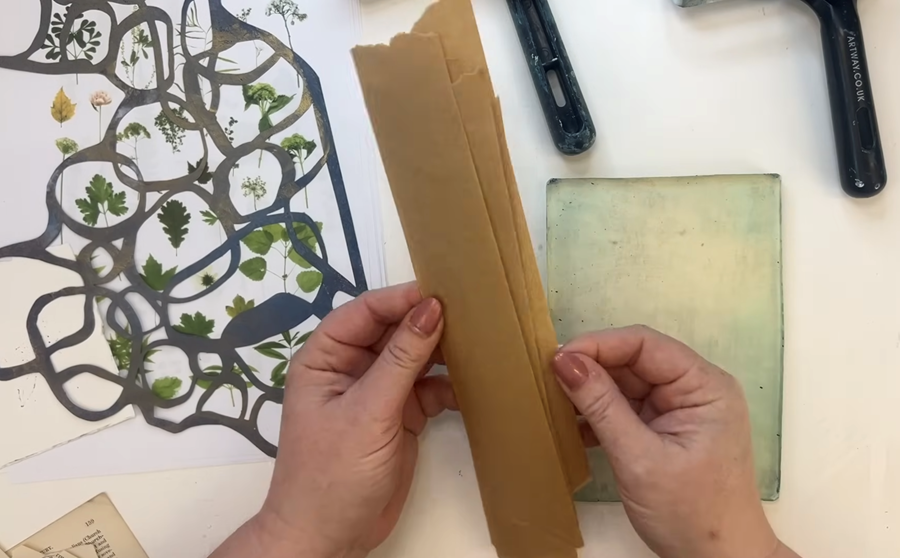
I've got here a roll of gum strip. It's a kraft paper adhesive tape and its main purpose is for stretching watercolour paper so it stays flat and doesn't buckle. Today I'll be using it to bind journal pages together.
Because the kraft paper is quite plain and doesn't really suit the look of my journal, I'm going to add some imagery to it - the kraft paper side is matte, so you can paint on it or Gelli print onto it with no trouble at all.
TIP: The other side is adhesive, so if you're planning to paint on it, take care not to get any water on this side. If it gets damp, it will become sticky and ruined.
I've got a few of these gum strips already painted and printed. I'll show you how to use a brayer to add paint to them, and how I Gelli printed onto them before cutting them into thinner strips. I'll be using these on my collage page at the end.

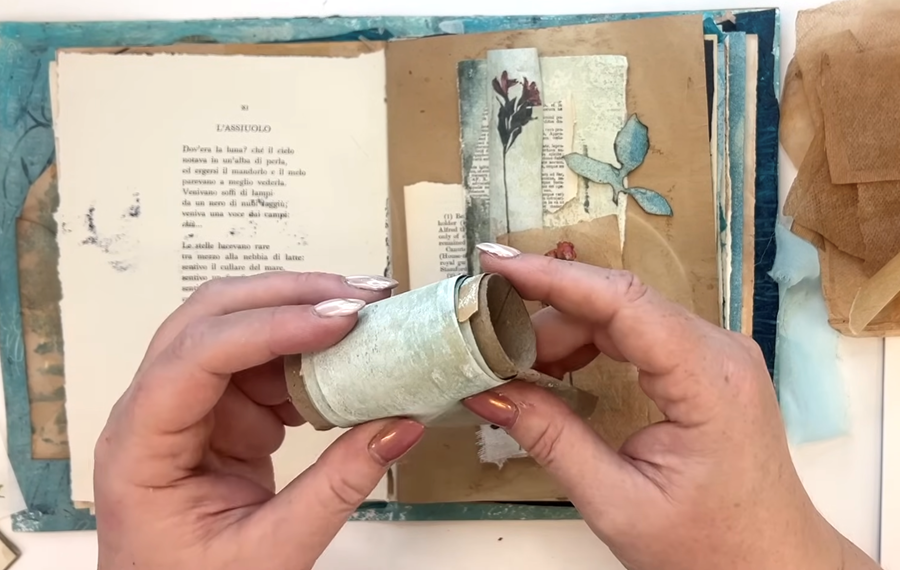
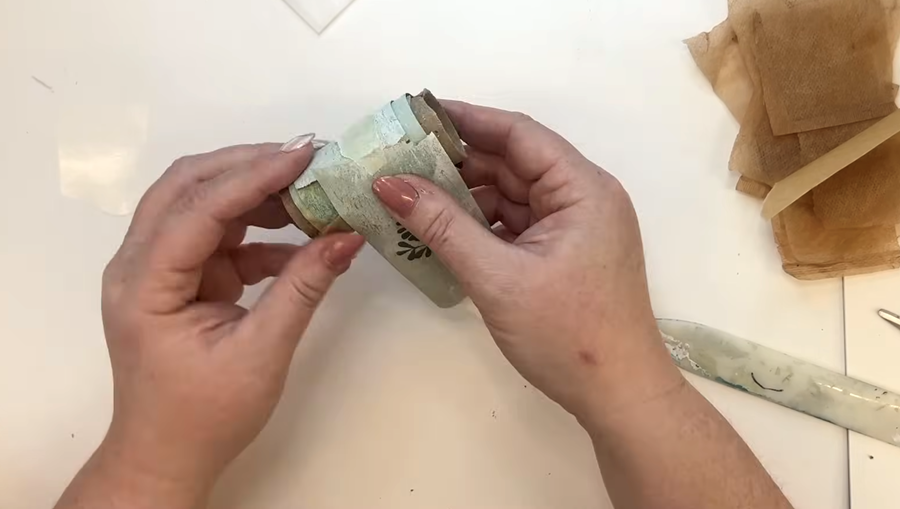
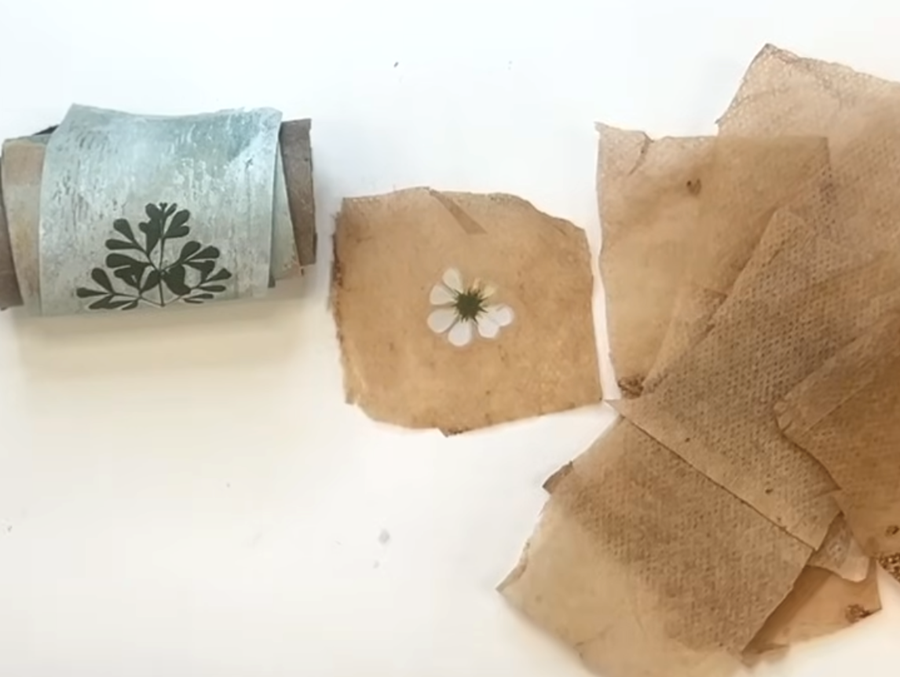
I've found that a nice way to store them is by wrapping them around an old cardboard tube from Christmas wrapping paper. It was a nice thin tube, so I cut it into smaller pieces and attached my paper strip with a bit of masking tape to secure it before rolling it round.
I'll start off by showing you how to create a delicate element by adding a leaf shaped transfer to the gum strip. My transfers are from a company called Taperology - they've got lots of lovely little leaf and floral designs.
I've taped the strip down first so it doesn't move about while I'm working.
![]()
I've chosen a leaf shape transfer here. I've just peeled the backing off and stuck it on top, pressing it down with my finger to make sure it’s well adhered.
Then I go over it again with my bone folder to really burnish it down.

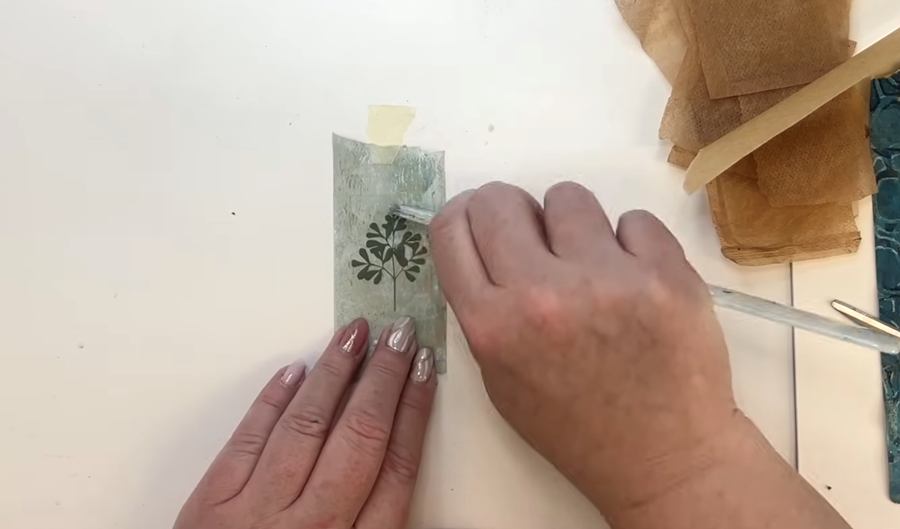
Now, I carefully peel back a little of the plastic layer to check if the transfer has taken. If it looks like it hasn't adhered properly, I lay the plastic back down and burnish it a bit more, working my way down and gently peeling back the plastic as I go.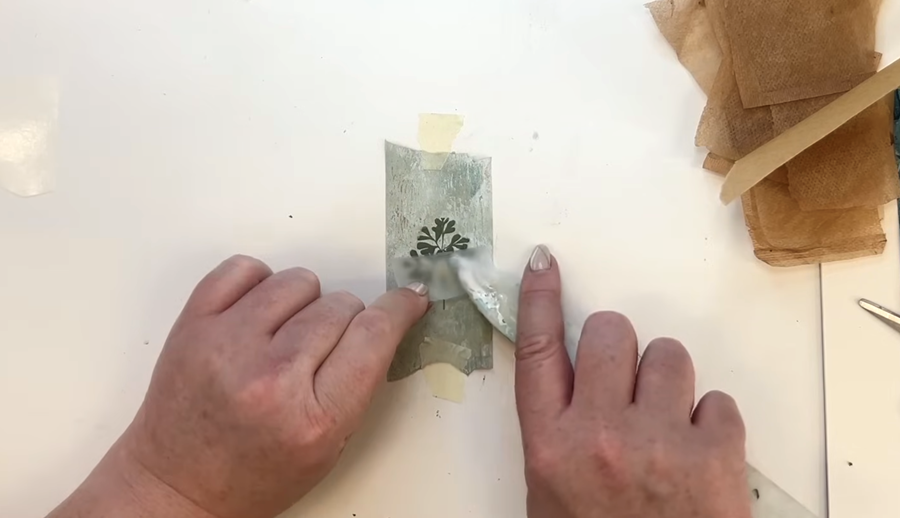
Next, to give it a softer look so it doesn't appear too much like a sticker, I like to roll a thin layer of paint over the top, just like I've done with this floral transfer here.
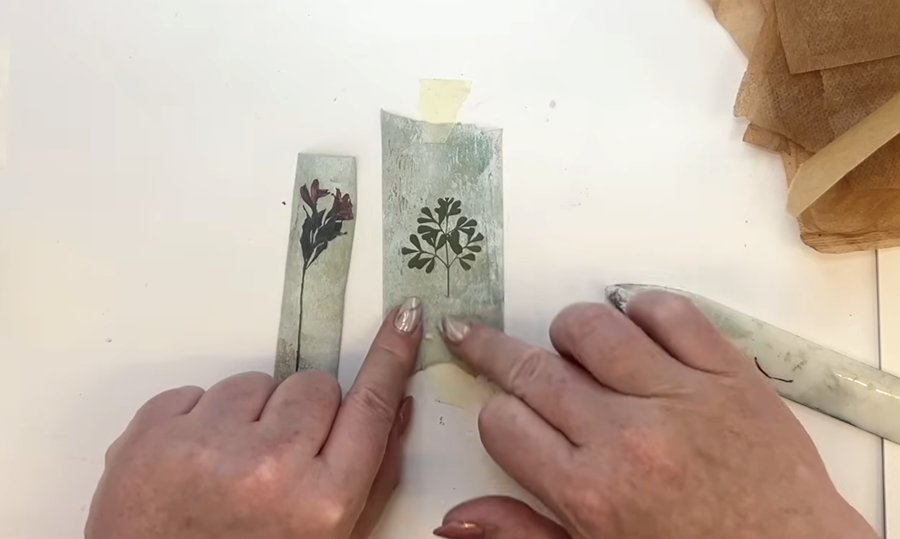
Once I'm happy with it, I use the tape to pop it onto my roll, ready to use on another page.
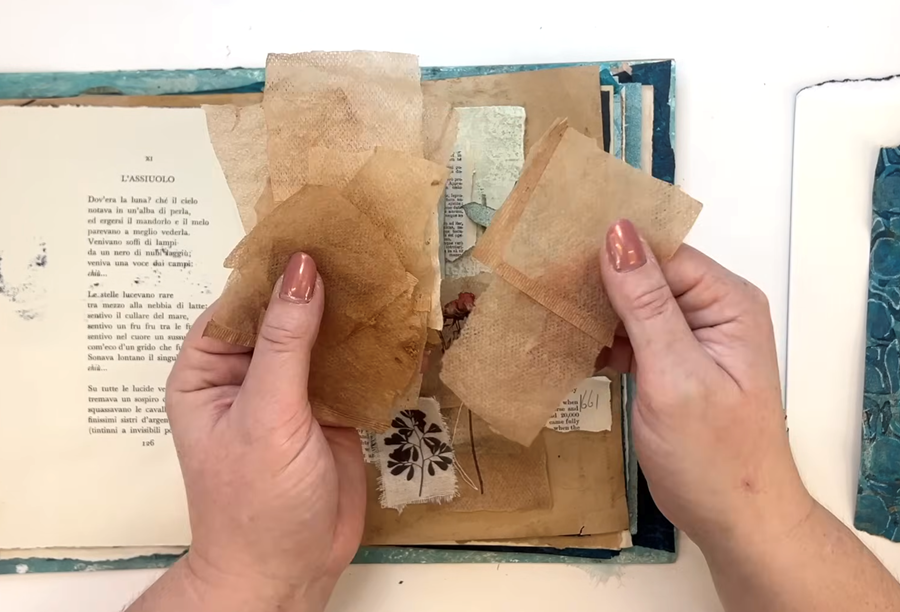
Adding Transfers to Teabags
Here I've got these teabags that I've saved, washed and dried. They've got a lovely, aged feel to them, which fits perfectly with the vintage vibe I'm going for in this handmade journal.
You can draw or paint really delicate designs onto these teabags, or you can add transfers like I'm about to. They're really versatile, and I find they work beautifully in collage pieces.
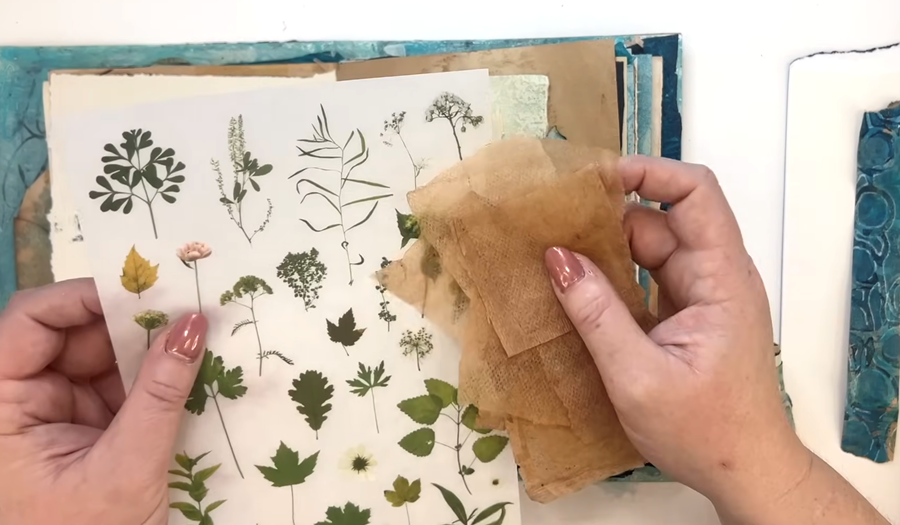
I've got a pretty white flower transfer here. The transfer sticks quite easily to the teabag paper, but I gently go over it with my bone folder to make sure it's properly adhered.
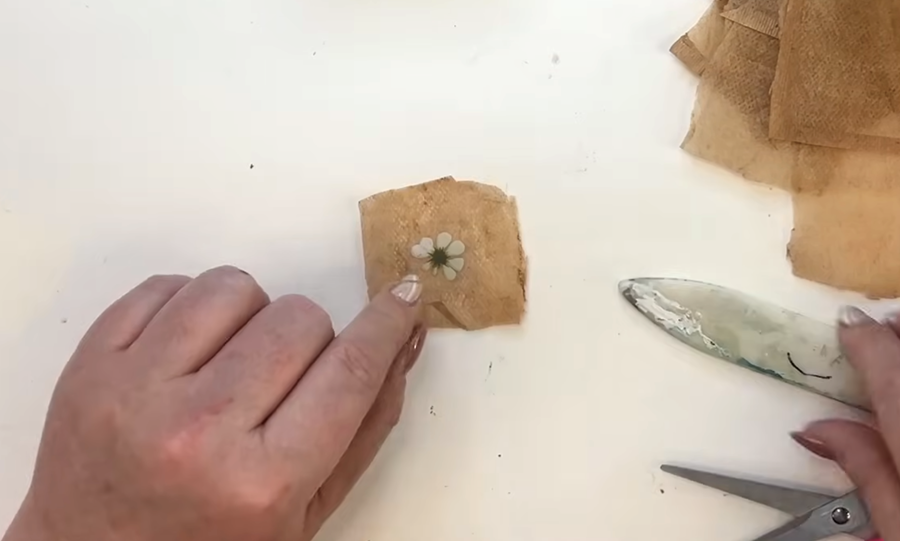
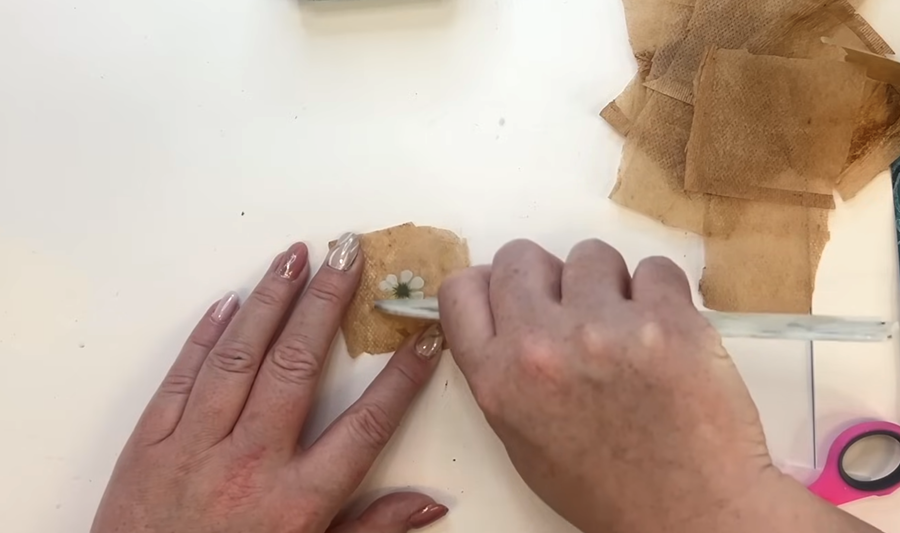
There we go! We've got two bits ready to use in our collages. If you like, you can cut them smaller and just use a tiny section, or you could draw a design onto them. Either way, they're lovely to have in your stash for collage projects.
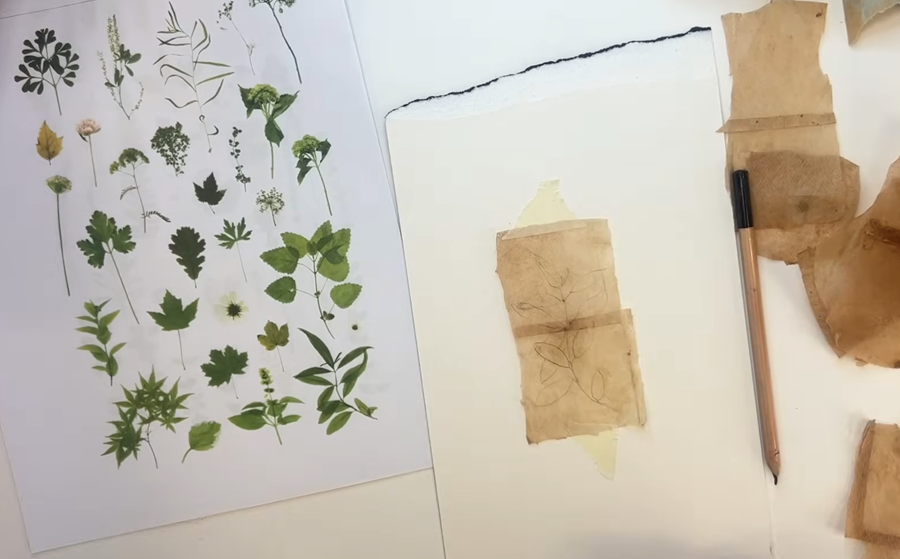
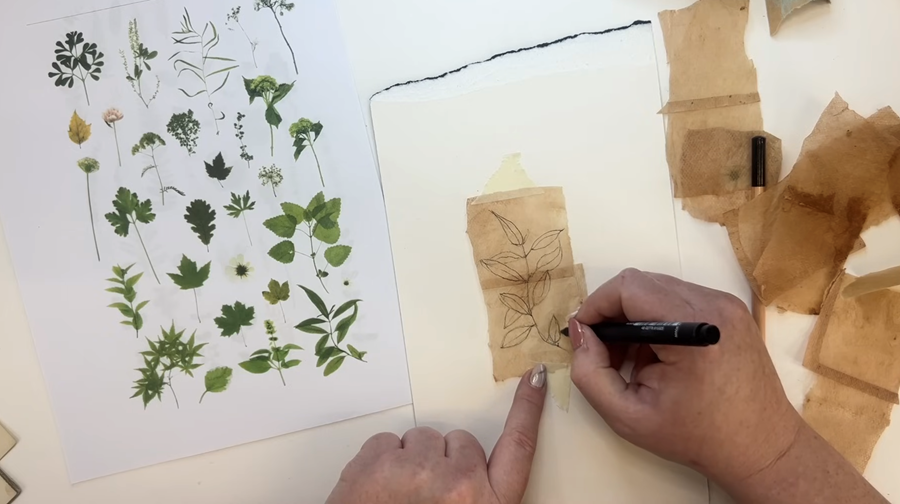
Drawing on Teabags
Next I'm going to try drawing on a piece of teabag paper. I've taped it to a piece of card with masking tape so I can move it around easily while I work.
I'm using my transfer stickers as reference for some leaf shapes. I'm sketching a simple stem with the leaves going in different directions for a bit of shape and interest.
I start with a pencil sketch and then, for a little more definition, I go over the lines with a fine-line pen.
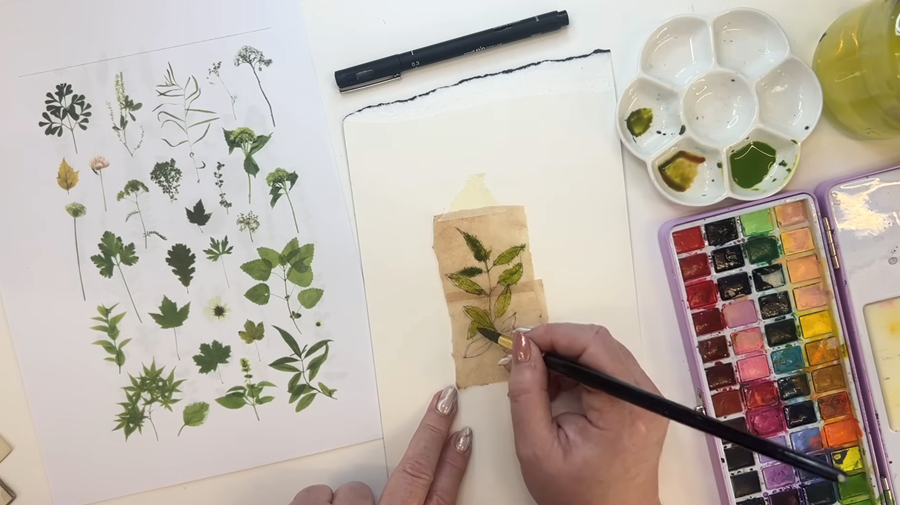
Now I’m adding a touch of watercolour to see what happens. The green I’m using is quite a strong pigment, so I’m softening it by mixing in a touch of red to mute it down.
TIP: If you’re planning to use watercolours over the top, be mindful of the type of pen you choose for your linework. The pen I used is permanent, so it’s not going to run when it touches the paint.
Once I'm done, I place it onto one of my journal pages that has text on it.
I really love how the writing shows through the teabag.
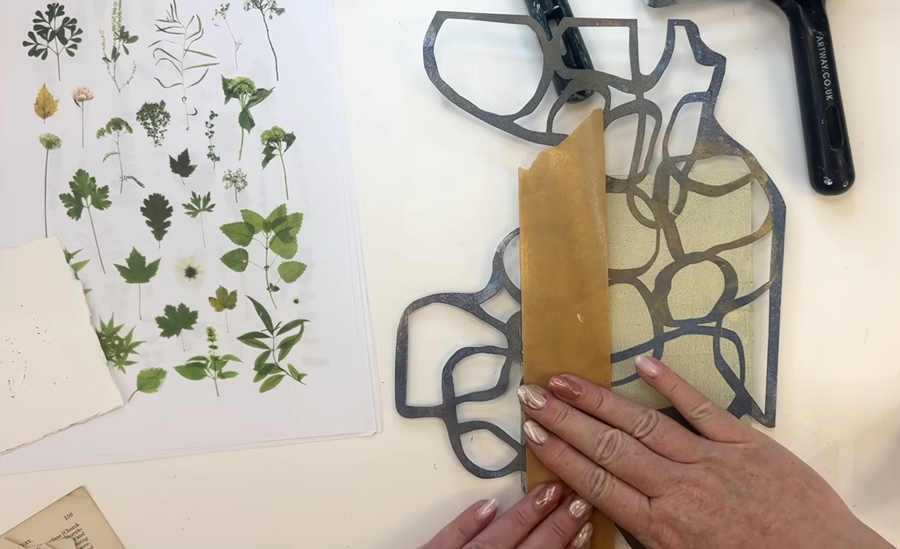
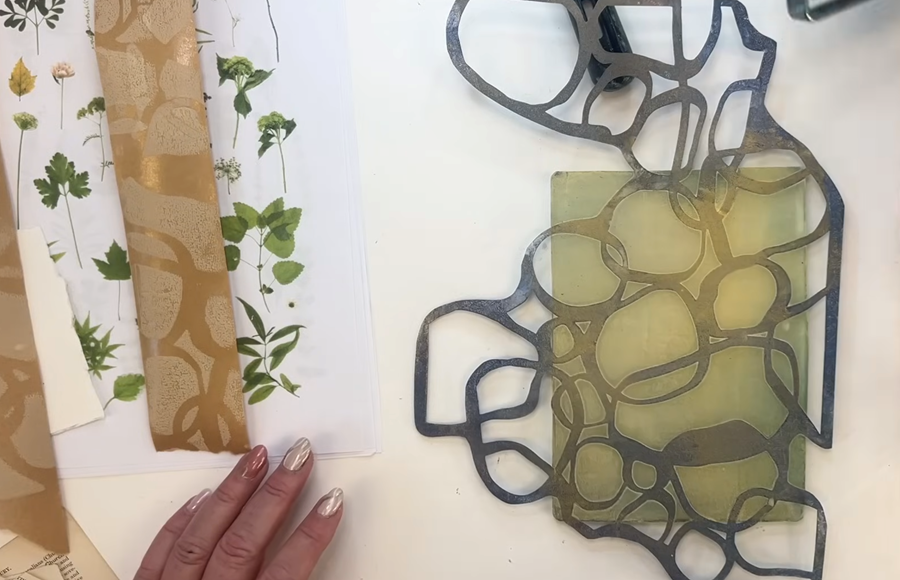
Gelli Printing on the Gum Strip
Now I'm going to show you a couple of different ways I like to print on the gum strips. I've got everything I need to hand including my 5x7 Gelli plate, my brayer, some paint, my stencil, and my gum strips.
I've cut the strips so they're all slightly longer than the book. That way, I can use them to add extra pages or cut them down for collage - they're really handy to have for different purposes.
I'm going for colours that are similar to those already in the book, and I want to keep them quite light. I'm going to build up a layered effect using Buff Titanium, Iridescent Gold, Raw Umber, and Titanium White. Layered together, they won't overwhelm the page - they'll sort of disappear into the background.
I'm starting with a layer of this soft Buff shade.
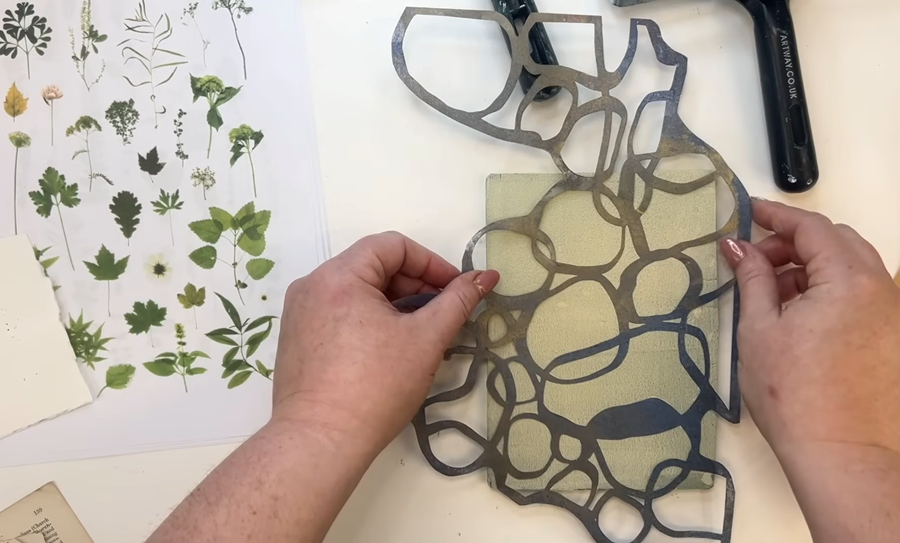
Then, I lay my stencil down onto the wet plate. I absolutely love this stencil - it was sent to me by one of my students in Germany.
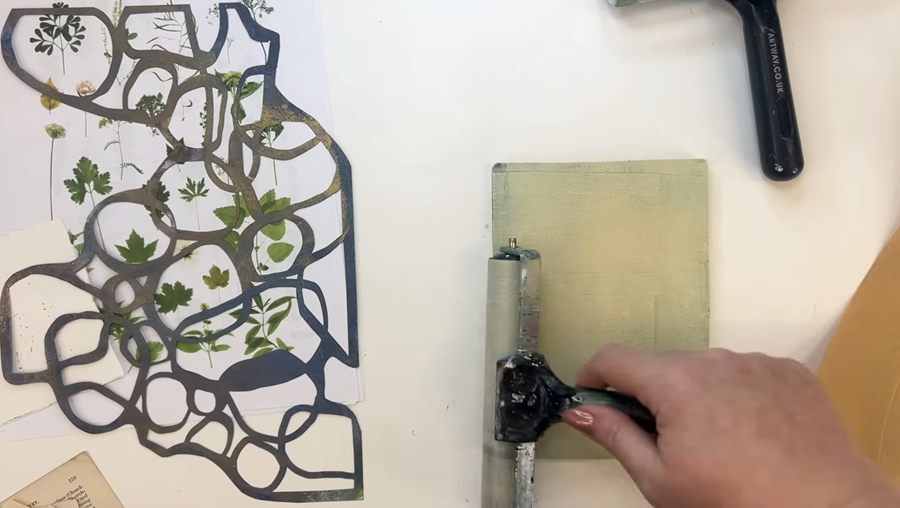
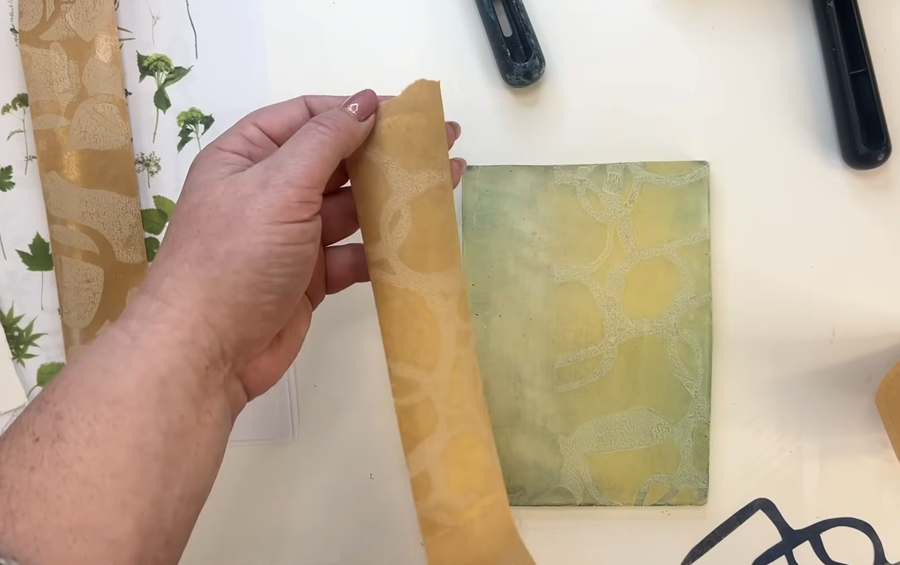
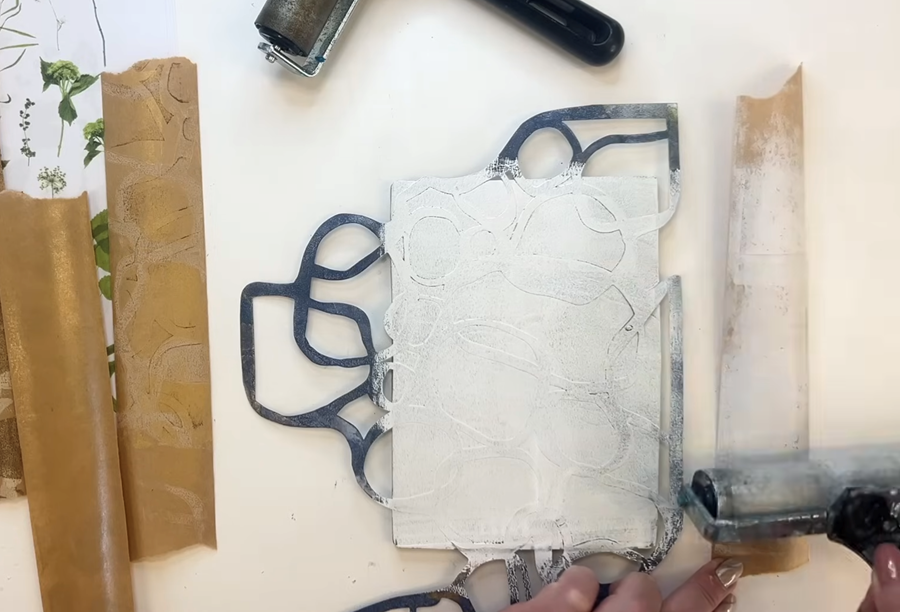
Now I place my first strip of gum paper onto the plate, with the matte side facing down. I run my hand gently over it a few times, back and forth, just to make sure it’s made good contact with the plate and the paint.
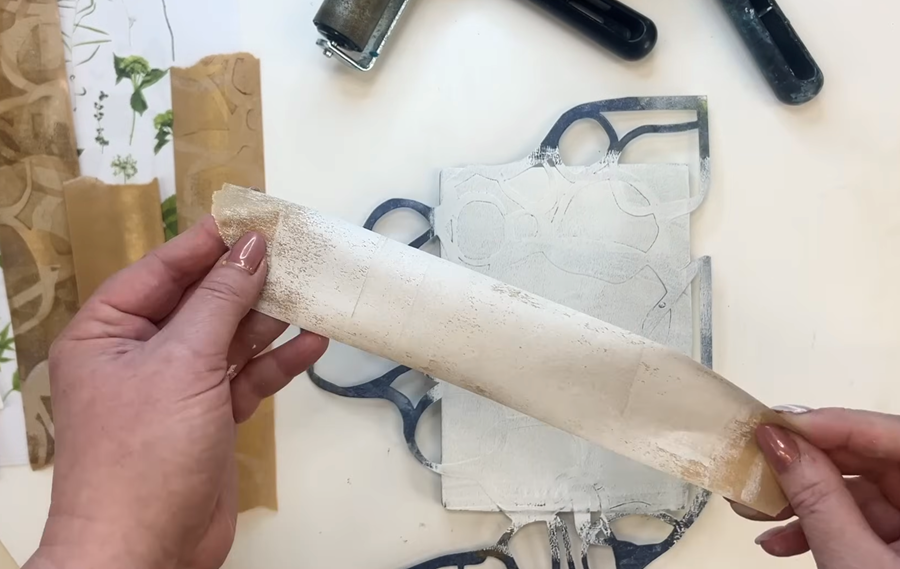
After that, I peel it back carefully to reveal my first print - this is the base layer I'll build on.
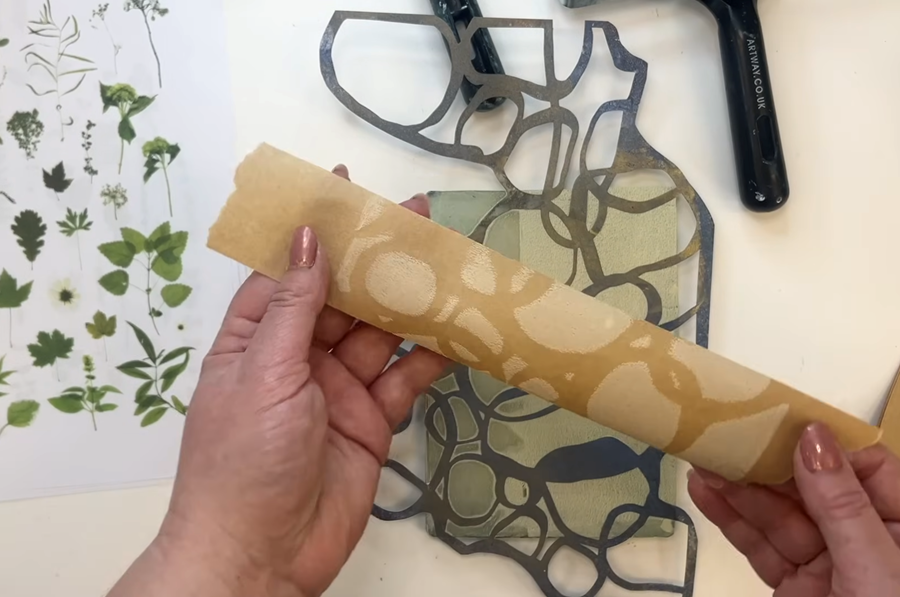
I repeat this process with my second strip, laying it onto the plate to pull up the remaining paint.
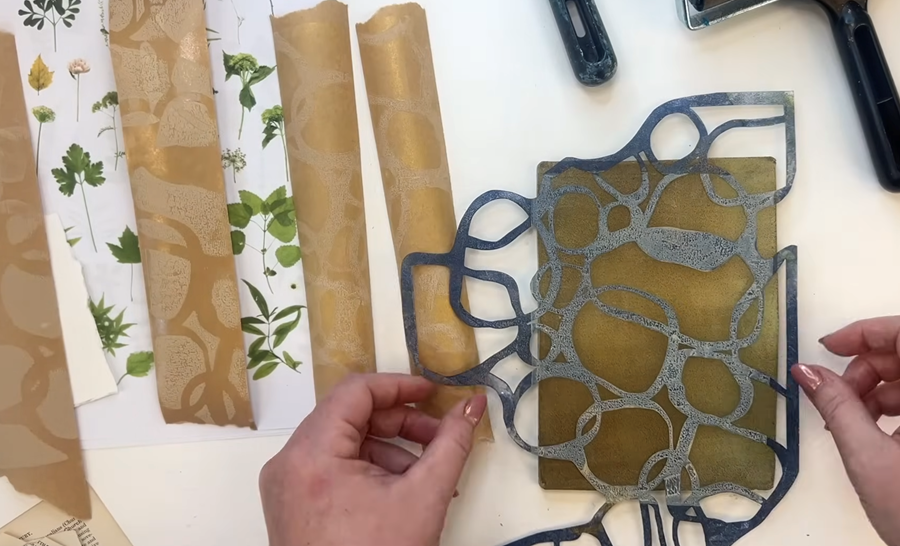
Next, I add a layer of iridescent gold onto the stencil and gel plate. I remove the stencil and pull the prints with 2 fresh pieces of gum strip.
The gold leaves a very soft, subtle effect - just a gentle shimmer that will sit beautifully in the background.
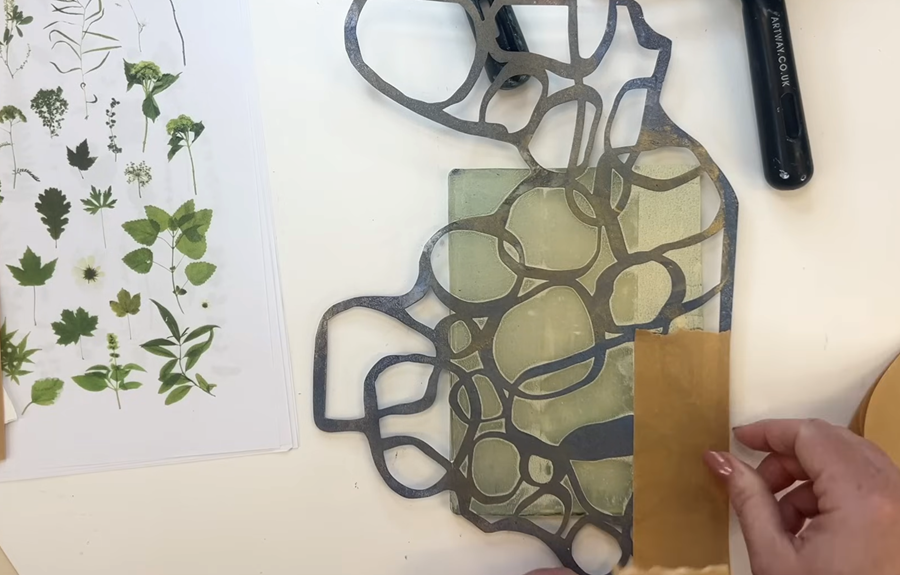
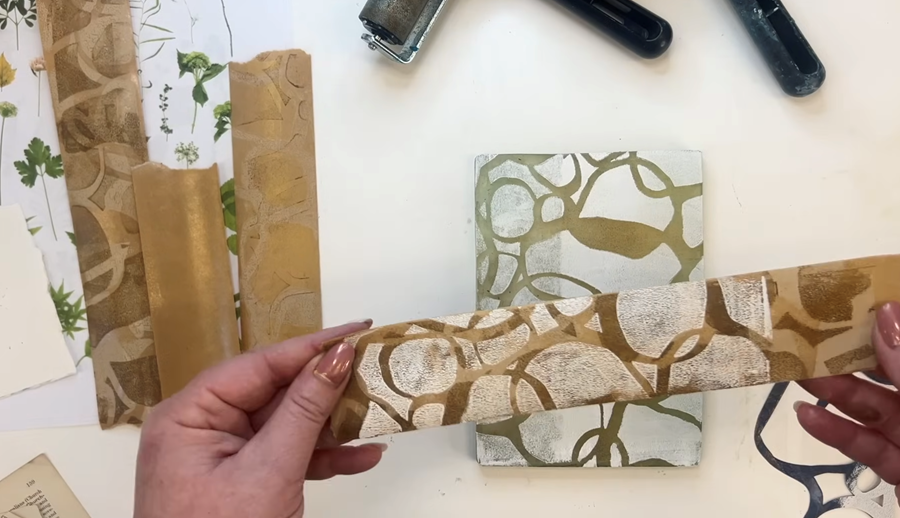
Now I roll a layer of Raw Umber onto the plate and pop the stencil back on.
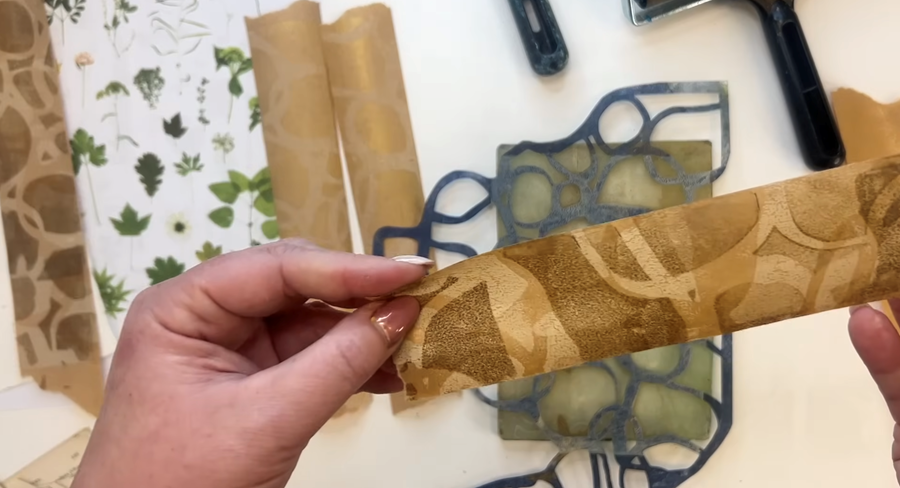
This time, I lay down the first strips I printed with the buff paint. Because Raw Umber is a semi-transparent, it creates a really lovely, layered effect.
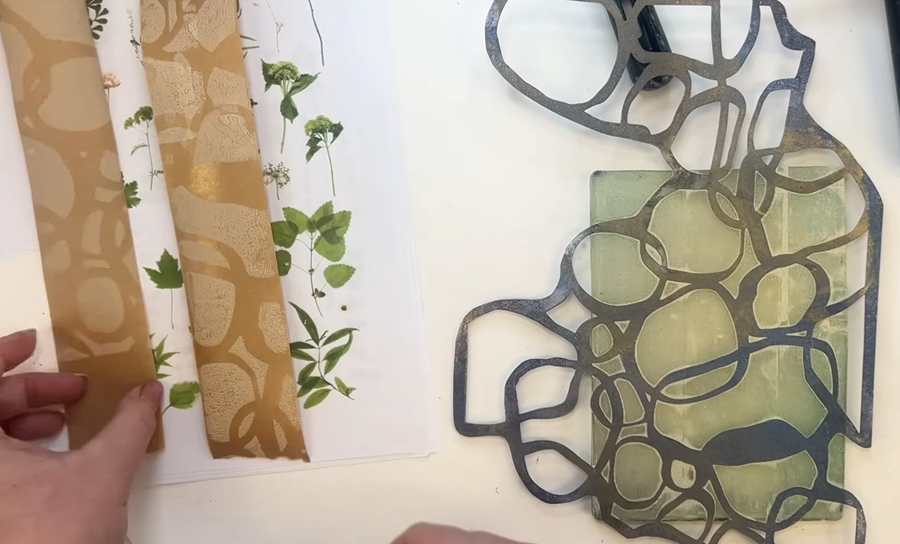
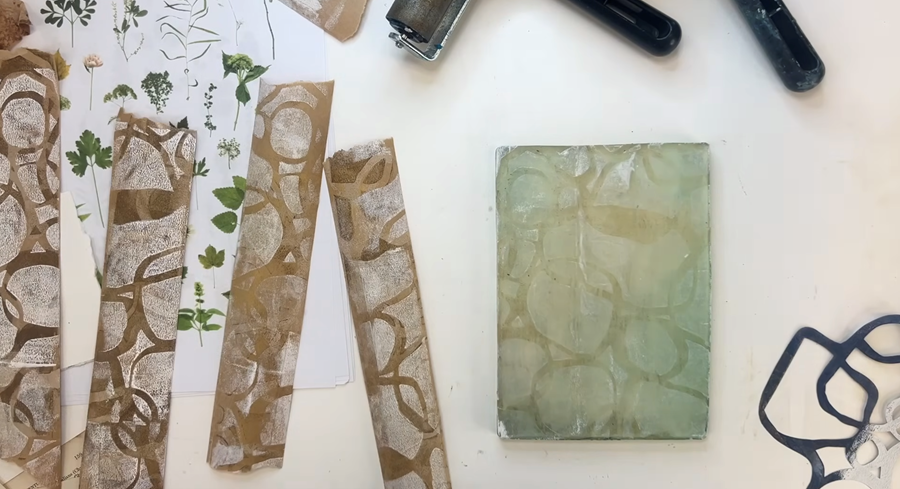
Finally, I'm adding a layer of Titanium White.
I've got a little spare paint left on the brayer, so I'm just rolling it straight onto a fresh piece of gum strip.
It's nice to have simple pieces like this - they make perfect base layers that you can draw or paint on top of later.
I remove my stencil and pull prints on all of my strips, one at a time. You can really see the lovely layers I've built up.
And that's how I use my Gelli plate to print onto gum strip!
Once the paint has dried, you can store the strips by taping them onto one of your rolls, ready to use for binding pages together or as part of your collage work.
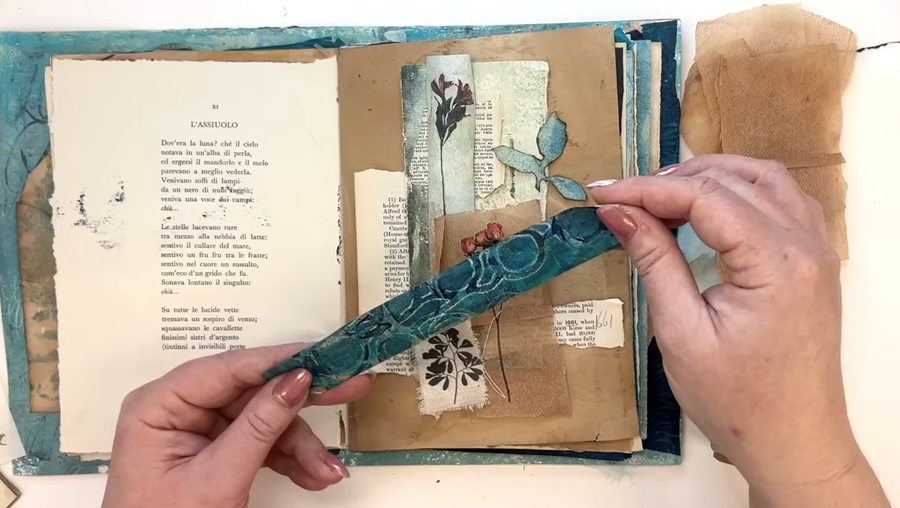
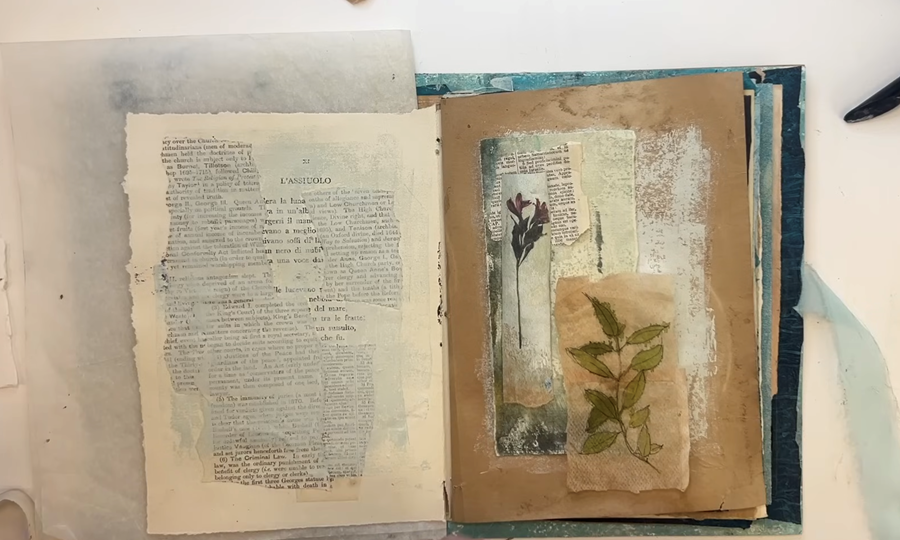
Building the Composition
Now that I’ve got all of my collage elements, I’m ready to start building my page. I begin by rolling on a very pale blue-green as a base layer and letting it dry.
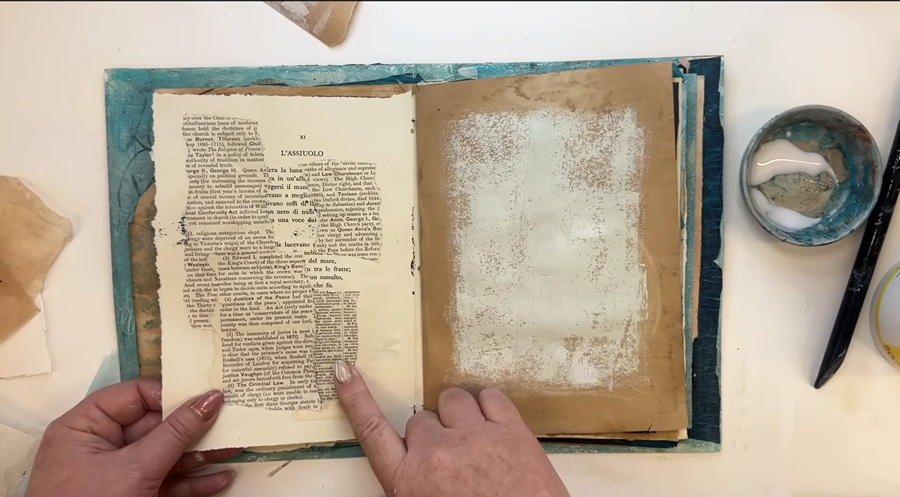
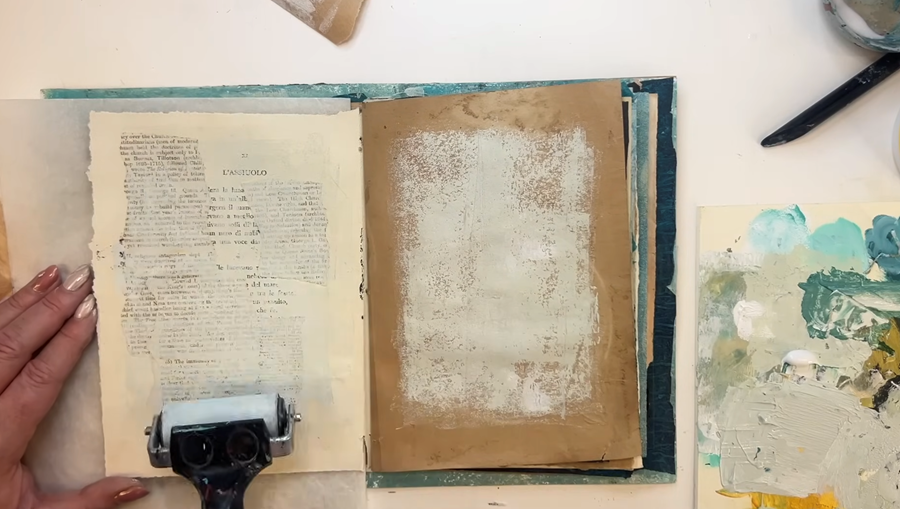
Next, I glue down a few pieces of old book pages over the page that already had some text on it. It will look really lovely to have those little hints of text peeking through the background.
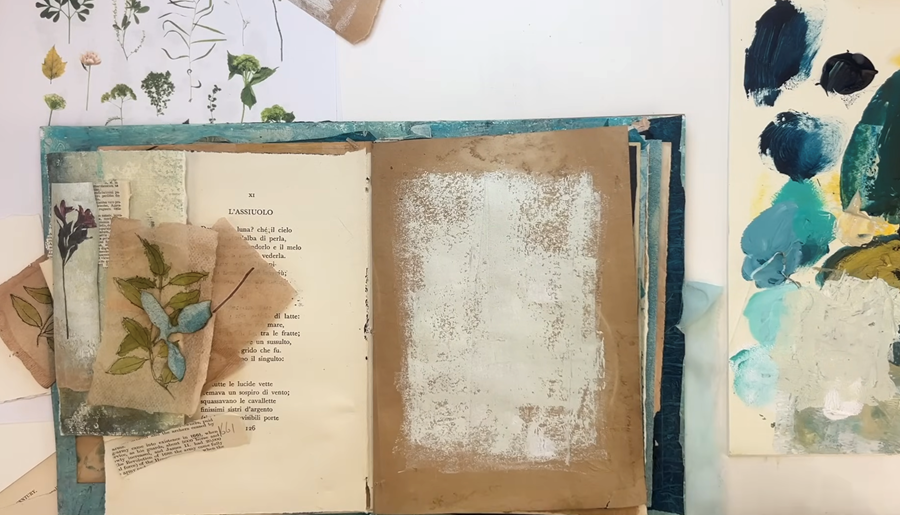
TIP: The book pages were very soft and absorbent, and the paper buckled quite a bit when I added the glue. Unfortunately, the moisture soaked through and the page stuck to the ones behind it as well. To avoid that happening, you can simply slide a piece of greaseproof or parchment paper underneath to protect the pages.
Thankfully, this is collage, and we can always work over the top of things, so it's not really an issue. These little things happen from time to time, and there are always easy ways around them.
In the end, I dried the page with a hairdryer and then gave it a quick press with the iron to smooth everything out.

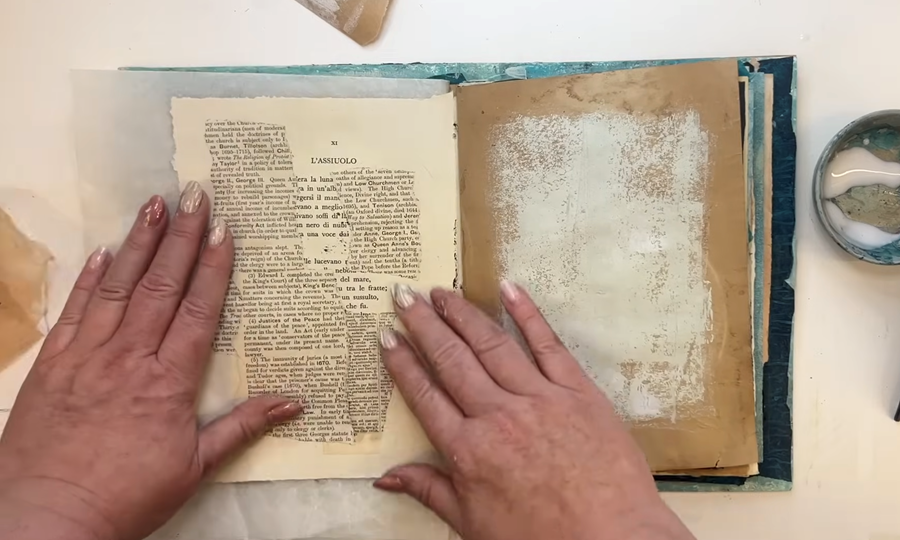
Next I roll on another little bit of paint over the text. I still want it to show through, but just softly - so you get the feel of it without being able to read it.
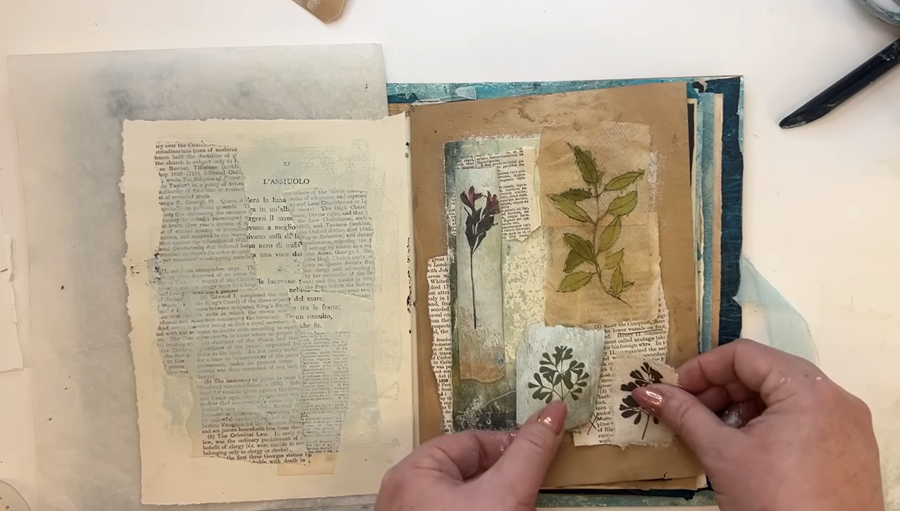
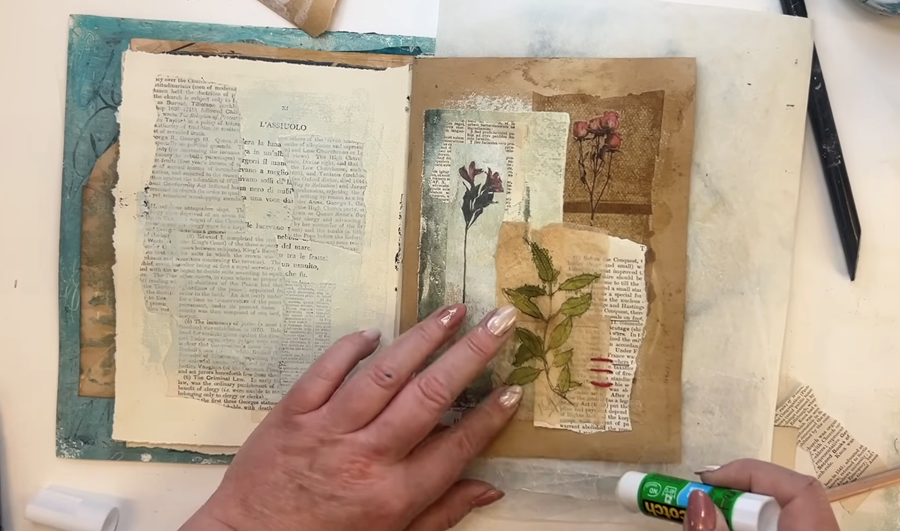
While that dries, I start arranging a little composition on the painted side, layering some of the pieces I've made and seeing how they sit together.
This is the part where I encourage you to play - mixing and matching, moving around bits of prints, fabric, and text until it feels right.
I really like how the two red florals balance each other, though I think that bottom corner could do with a tiny stitch or something for a bit of extra interest. I try out a few different shades of red and orange thread until I land on just the right one.
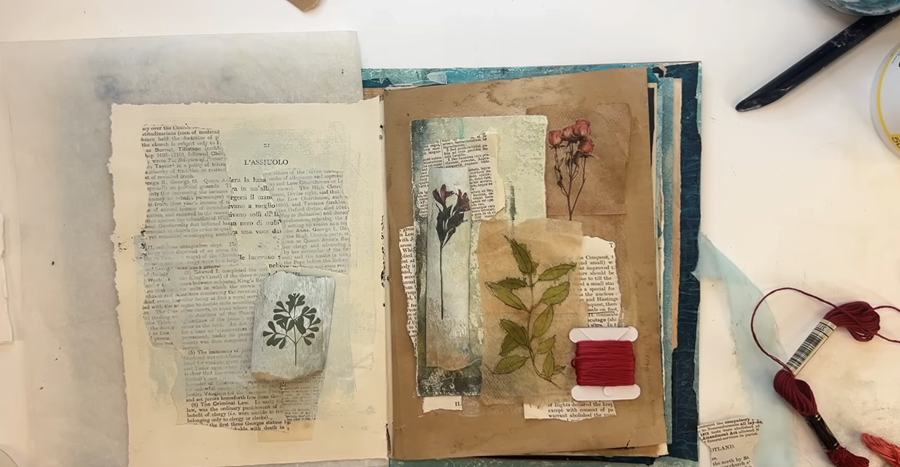
Before I glue everything down, I like to take a quick photo so I can remember exactly where I've placed each element.
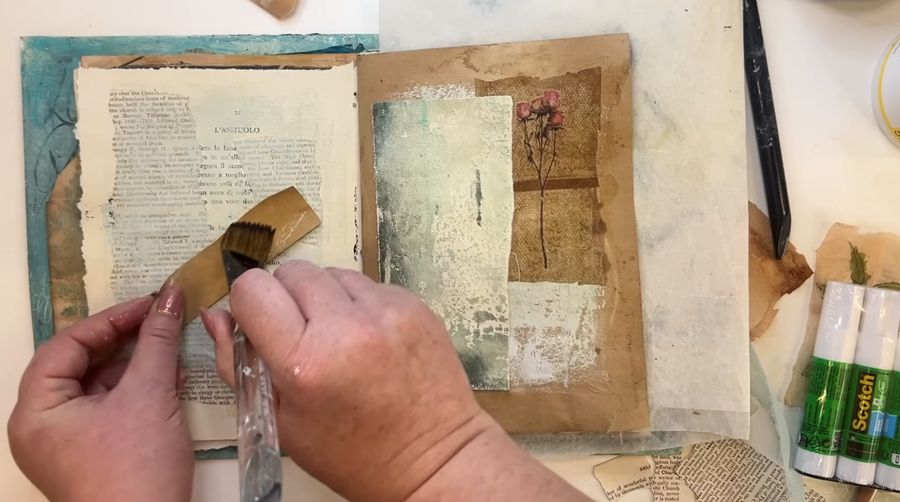
I've got the photo open on my iPad, which makes it easy to double check the layout as I stick everything down with my glue stick.
For the pieces of gum strip, I simply brush a little water onto the back to activate the glue. I pop those on first, then add the other elements, one by one, and finish with the stitched piece.
Here we have it - the final composition!
I'm really quite pleased with how that's come together.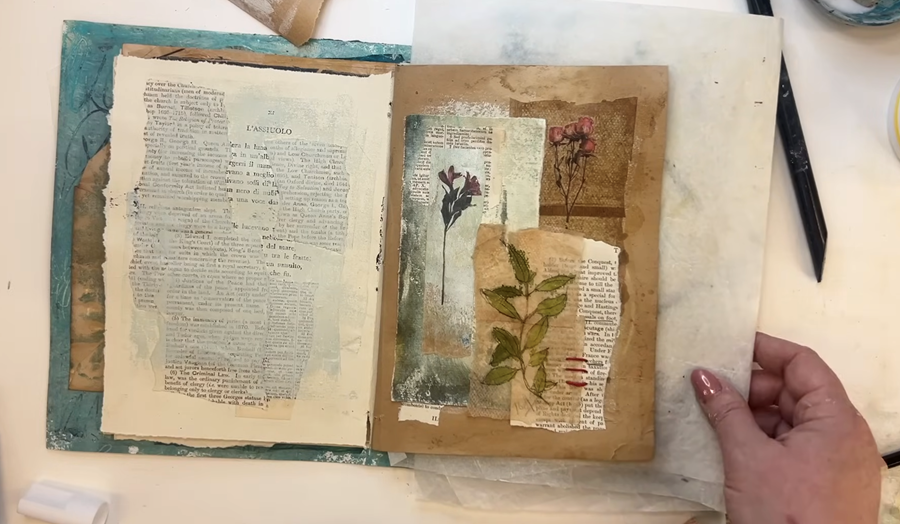
Thanks so much for following along. I really hope you've enjoyed seeing the whole process from start to finish throughout this series, and that you've picked up a few helpful tips and tricks along the way.
Be sure to sign up for my newsletter so you never miss a new tutorial. I also offer a FREE course called The Essence of Landscape, where I show how to turn your prints into finished paintings.
Until next time - happy printing!
Susan
We hate SPAM. We will never sell your information, for any reason.